How to create new stock locations in a warehouse
1. Go to Inventory>Warehouses
2. Select the warehouse where you want to add the location.
3. Click on the plus to add a new location.
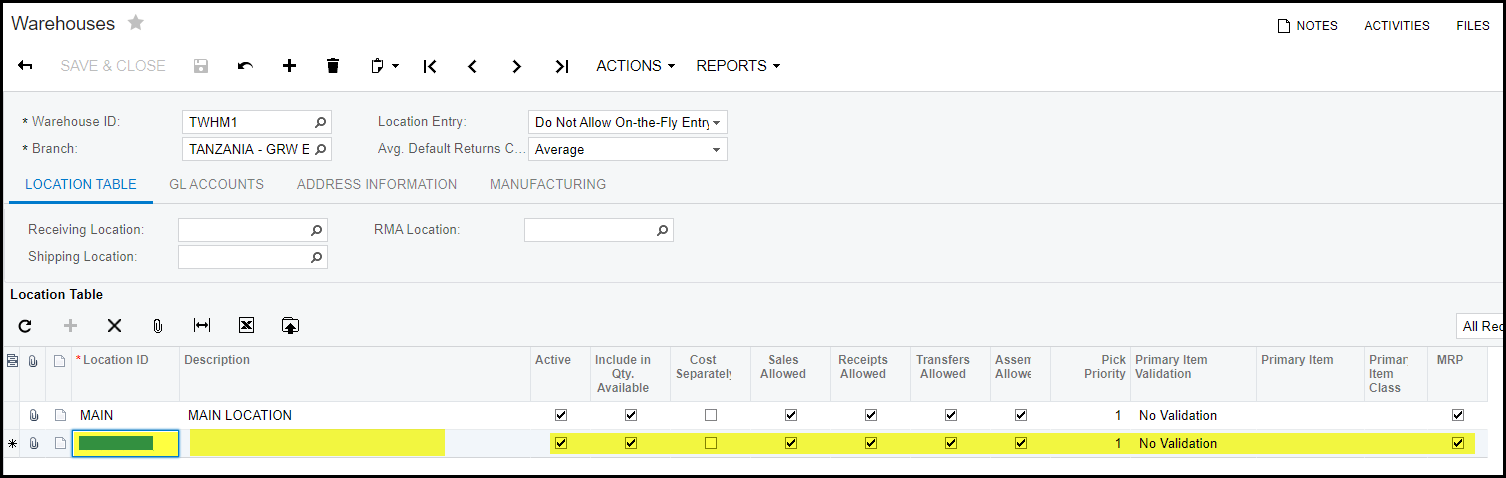
4. Give a location ID and description.
5. Make sure to tick all the correct ticks in the way you want to location to work. . When you click on the plus to add a new location the default ticks will show. Make sure that this is correct. See explanation for the ticks below
- Active - the tick should be on for the location to be active.
- Include in qty avail - this tick should be on if you always want this location's qty to be part of the calculation for qty available.
- Cost serparately - do not tick this one.
- Sales Allowes - stick if you want sell your goods out of this location.
- Receipts allowed - normally this is not ticked and we use only one Receiving location and transfer the stock from Receiving location to the storage location.
- if you want to receive into your new location then 'receipts allowed' must be ticked.
- Transfers allowed - best that this should be ticked otherwise you will not be able to do tranfers form or to this location.
- Assembly allowed - this must be ticked.
6. After you location is created click on SAVE.
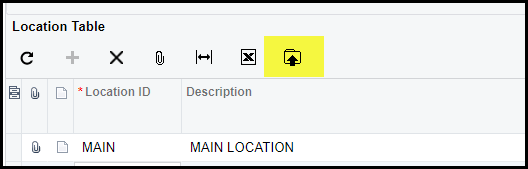
7. You can use the import function to upload your new locations if it is a lot of locations you need to add.
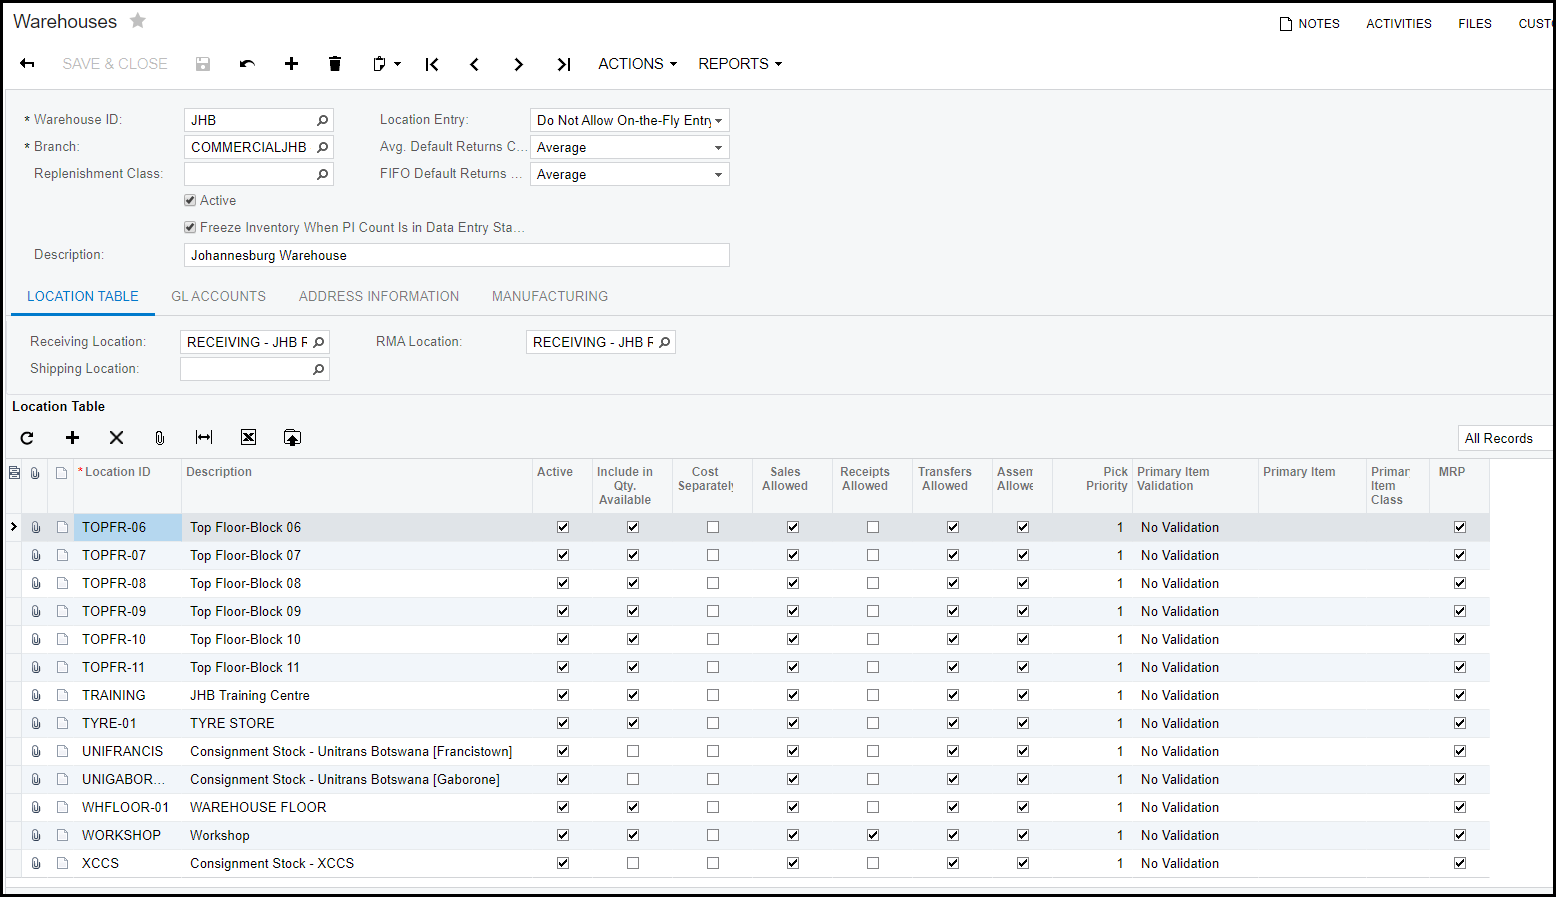
8. See below the example.
Created with the Personal Edition of HelpNDoc: Transform Your Documentation Process with HelpNDoc's Project Analyzer